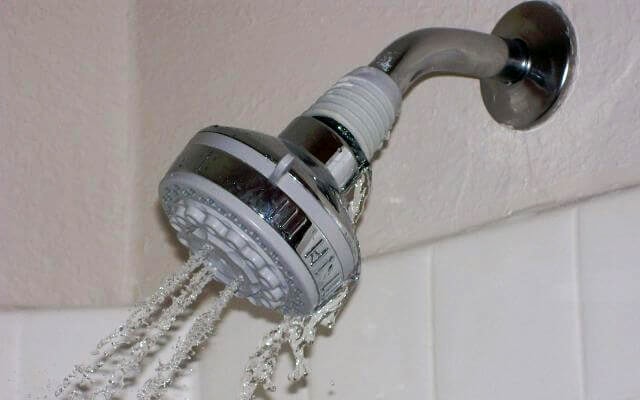
Have you ever stepped into a shower, only to be greeted by a relentless drip? A leaky showerhead is more than just an annoyance—it can waste hundreds of gallons of water and inflate your utility bills. But fret not, for you have the power to silence this water symphony and restore tranquility to your showering experience. With our comprehensive guide, we’ll walk you through the steps on how to fix a leaky showerhead, empowering you with the skills to tackle this plumbing nuisance with confidence.

Image: cymiss.com
Before we dive into the hands-on fix, let’s take a moment to understand why showerheads leak. Understanding the root cause will help you prevent future leaks and save you the hassle of repeated repairs.
Causes of Leaky Showerheads
Damaged Washers: Washers, typically made of rubber or plastic, create a watertight seal between the showerhead and the pipe. Over time, washers can wear out, crack, or become dislodged, allowing water to escape and cause a leak.
Loose Connections: The joint where the showerhead connects to the pipe or extension arm can loosen over time, resulting in a leak. This is often caused by insufficient tightening or movement caused by water pressure.
Corrosion: Exposure to moisture and minerals in water can lead to corrosion of the showerhead’s internal components, compromising the watertight seal and causing leaks.
Clogged Nozzles: Mineral deposits and sediment can accumulate in the showerhead’s nozzles, blocking water flow. This obstruction can increase water pressure behind the blockage, leading to leaks at the showerhead’s base.
Step-by-Step Guide to Fixing a Leaky Showerhead
Tools and Materials You’ll Need:
- Adjustable wrench
- Plumber’s tape
- Replacement washer
- Cloth or towel

Image: removeandreplace.com
Step 1: Shut Off the Water Supply
Before you start, safety should be your top priority. Locate the shut-off valve responsible for your shower, typically located beneath the sink or behind the shower panel. Turn the valve clockwise to shut off the water supply.
Step 2: Remove the Showerhead
Using your adjustable wrench, gently turn the showerhead counterclockwise to loosen it from the pipe or extension arm. Be mindful not to overtighten or damage the showerhead.
Step 3: Inspect the Washer
Examine the washer that sits between the showerhead and the pipe. If the washer is damaged, torn, or dislodged, it will need to be replaced.
Step 4: Replace the Washer (if necessary)
Take the replacement washer and place it over the threads of the showerhead. Ensure it’s sitting properly and is not folded or damaged.
Step 5: Apply Plumber’s Tape
Wrap plumber’s tape around the threads of the showerhead, starting from the base and moving upwards. Wrap the tape clockwise in a neat and overlapping fashion, creating a watertight seal.
Step 6: Reattach the Showerhead
Align the showerhead with the pipe or extension arm and gently tighten it clockwise using your wrench. Be sure to tighten it securely but avoid overtightening, as this could damage the showerhead or pipe.
Step 7: Turn on the Water Supply
Return to the shut-off valve and turn it counterclockwise to restore water flow to your shower. Check for any leaks around the base of the showerhead.
Step 8: Adjust Nozzle Position (Optional)
If your showerhead has adjustable nozzles, take this opportunity to direct the water flow as desired. Use your fingers to gently adjust the nozzles until you’re happy with the spray pattern.
How To Fix Leaky Showerhead
Step 9: Enjoy Your Leak-Free Shower
After completing these steps, your showerhead should be leak-free, providing you with a relaxing and refreshing showering experience. If, however, you still encounter leaks, it’s advisable to consult with a qualified plumber for further assistance.
A leaky showerhead is a common problem with a simple solution. By understanding the causes of leaks and following the step-by-step guide provided in this article, you’re well-equipped to tackle this plumbing issue independently. Remember to prioritize safety, use the right tools, and if you’re unsure, don’t hesitate to seek professional help. Enjoy a leak-free showering experience, and may your water bills be forever grateful for your efforts.
If you found this article helpful, please share your thoughts and experiences in the comments section. Together, we can create a community of empowered homeowners and problem-solvers. Happy fixing!